Plugin Title – Pulse Scroller1.0

Short Description – This plugin is a scroller which can contain many elements like social media, images, videos, text slider, coupons, custom menus, etc. This plugin is very useful for those who are using WordPress as their programming tool; this is an excellent plugin which provides many unique features along with its attractive front end look.

Download user guide.

Features  – This plugin contains many elements like video, images and social media.

  1. Image – An image can be added in this scroller by using WordPress media library.
  2. Video – Video can be added simply by entering URL from Youtube, Vimeo, or from a default WordPress URL.
  3. Youtube – Add video by copying and pasting the video URL.
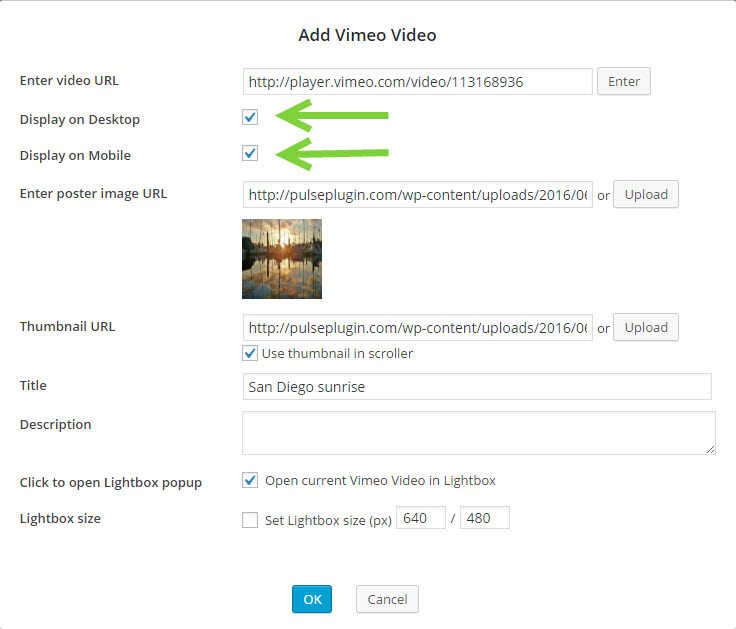
  4. Vimeo – Add video by copying and pasting the video URL.
  5. Slider – A slider can be used as an element in the scroller. It will work in the scroller as well as in the popup generated when clicking on the slider element.
  6. Custom Menu- Create custom menus in the scroller which can be used for internal and external links.
  7. Coupons – Create custom coupons to display on the scroller using WordPress shortcodes.
  8. Social Media – View social media profile feeds. Including Facebook, Instagram, Yelp, Pinterest, Twitter, and Google plus.  
  9. Message – You can create any custom message above or below the scroller.  This message can be texted from smartphones using the Pulse plugin App. Download the App from the Plugin settings in WordPress.
  10. Mobile Utility – Message shown above or below the scroller can be added or updated by an android application from your smartphone.

– Download the Pulse Scroller zip file you receive upon purchase to your computer’s hard drive.

– In the WordPress dashboard, hover over “Plugins” and click on “Add New”.

– Choose “upload plugin”, navigate to and select the zip file saved on your computer’s hard drive.

– Choose “install now” and then activate the plugin.

– Click on “Pulse Scroller” in the WordPress dashboard.

– Click on “Overview”.

– Click on “Create A New scroller”.

– Add the elements options you want to be displayed on the scroller.

– After choosing the elements you want to include in your scroller, click “save & publish”.

Desktop MobileHide or display individual elements on desktop or mobile by adding or removing the check in the corresponding checkboxes within each scroller element setup screen.

– Select “manage scroller” in the WordPress dashboard and then click “edit” on the scroller you want to add your social media to.

– Click on the social media element you want to add and input your account details.

– Click “OK” then click “Save & Publish”.

– To edit existing scrollers, go to “manage scroller” and click “edit” on the scroller you want to edit.

–  If you want to delete an existing scroller, simply click “trash” and the selected scroller will be deleted.

– To add a coupon, hover over “Pulse Scroller’ from the WordPress dashboard and click “Coupons”.

– A new window will open and it will give you the options to add a new coupon or edit existing coupons.

– Customize coupons by clicking “edit” on the coupon and you will be able to edit the content displayed on the coupon. Including the style, expiration, and the image to be displayed in the scroller.

– To add, edit, or delete messages, hover over “Pulse Scroller” from the WordPress dashboard and click “Message”.

– From this page, you will be able to add a message, manage message settings, update existing messages, and delete existing messages.

– To download the Pulse Scroller messages app hover over “Pulse Scroller” from the WordPress dashboard and click “Message”.

– Clink on “Mobile App” in the “Message” page.

– The following screen will allow you to download the mobile app and will display your four digit access key required to login from your phone.

– Download the app and install on your device. (Once the App has been downloaded you can email yourself the app or transfer through usb to place it on your mobile device for install.)

– To login in, simply input your domain in the domain field and the four digit access key.

– After you login, you will be able to add, edit and delete messages.